Skip to main content
949.481.9850
Phone
Home
About
Meet Dr. Doezie
Our Practice
Meet the Staff
Breast Procedures
Breast Augmentation
Breast Lift
Breast Reduction
Breast Revision
Breast Implant Removal
Breast Reconstruction
Fat Grafting
Implant Size Change
Implant Rupture
Breast Implant Malposition
Capsulectomy
Male Breast Reduction
Body Procedures
Mommy Makeover
Tummy Tuck
Liposuction
Fat Grafting
Arm Lift
Body Lift
Scar Revision
Hand Rejuvenation
Face Procedures
Facelift
Eyelid Surgery
Brow Lift
Rhinoplasty
Prominent Ear Surgery
Earlobe Repair
Lip Lift
MedSpa Services
Facial Rejuvenation
CoolPeel® CO2 Laser Treatment
Injectable Fillers
BOTOX® Cosmetic
Kybella®
Intense Pulsed Light (IPL) Treatment
Microneedling
Skin Care
Skin Care Treatments
Fractional CO₂ Laser
Chemical Peels
Skinbetter Science®
ALASTIN Skincare®
EltaMD® Sunscreen
LATISSE®
SkinMedica®
DiamondGlow®
Nutrafol®
Photo Gallery
Patient Resources
Patient Information
Patient Finance Program
Blog
Contact
Get in Touch
777 Corporate Drive
Suite 110
Ladera Ranch, CA 92694
949.481.9850
Facebook
Instagram
Youtube
Body Lift Gallery
Back To Galleries
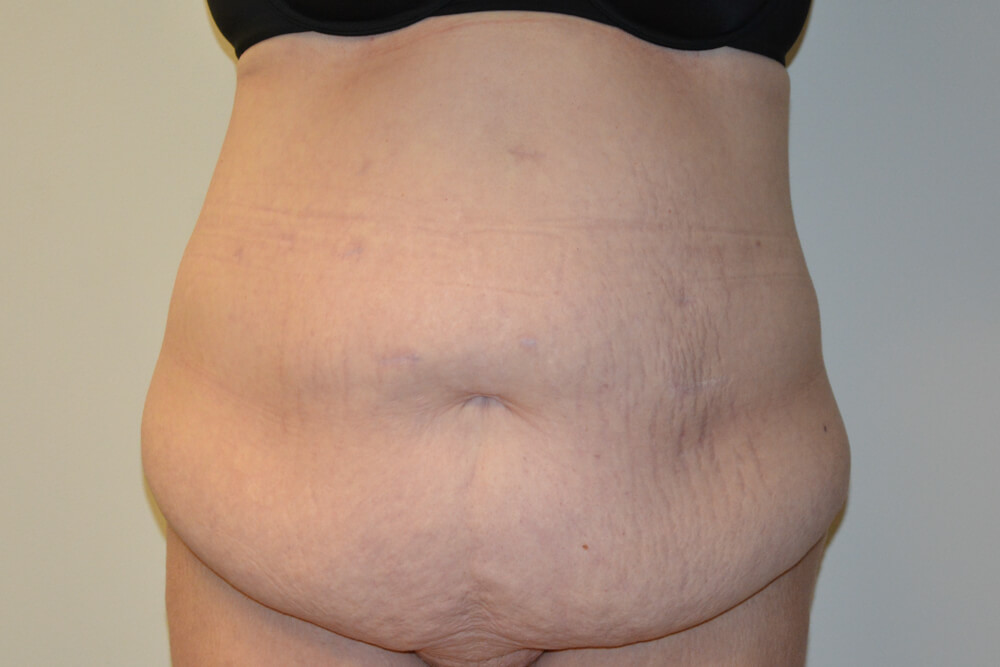
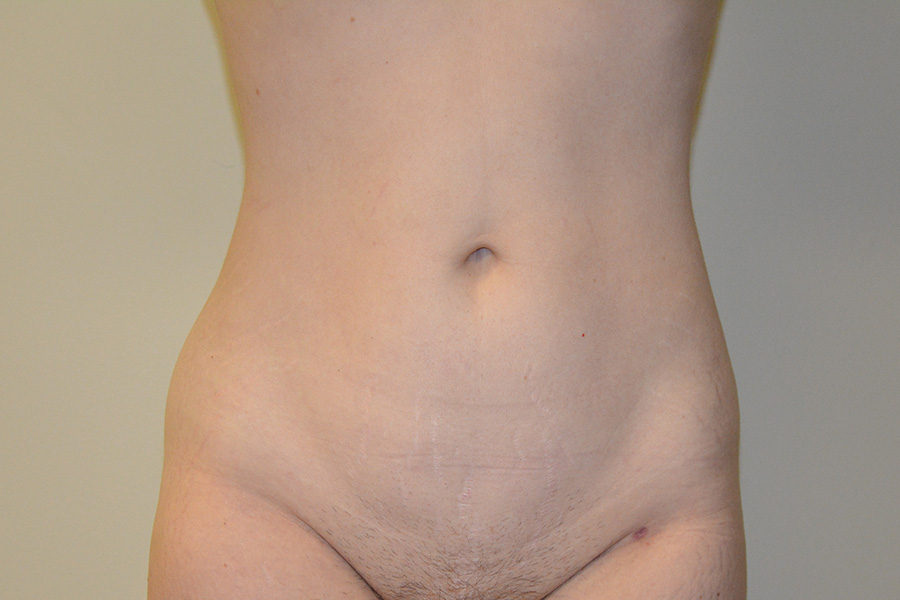
Patient 1
Procedure:
Body Lift
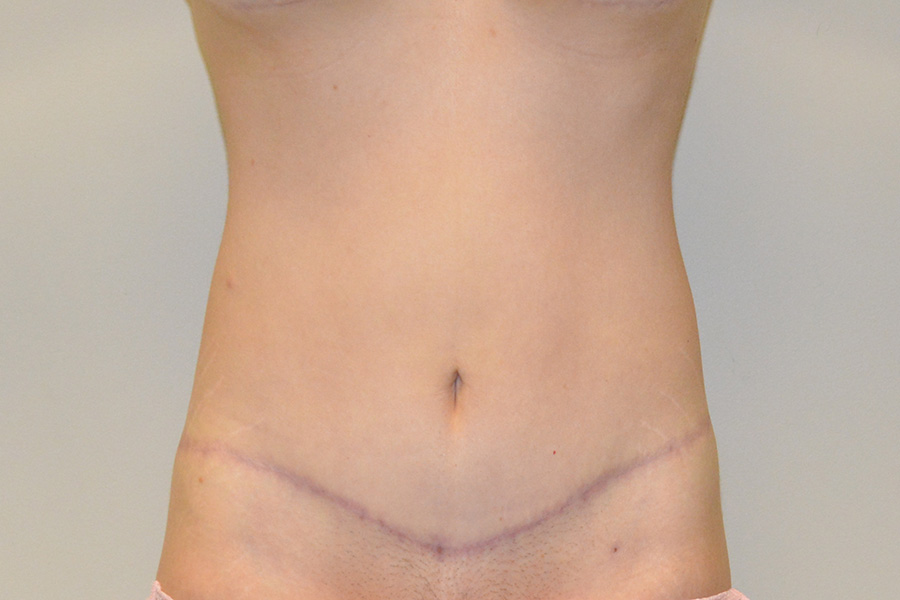
Patient 2
Procedure:
Body Lift
Follow Us On
Facebook
Instagram
Youtube
Please ensure Javascript is enabled for purposes of
website accessibility