Get in Touch
777 Corporate Drive Suite 110 Ladera Ranch, CA 92694
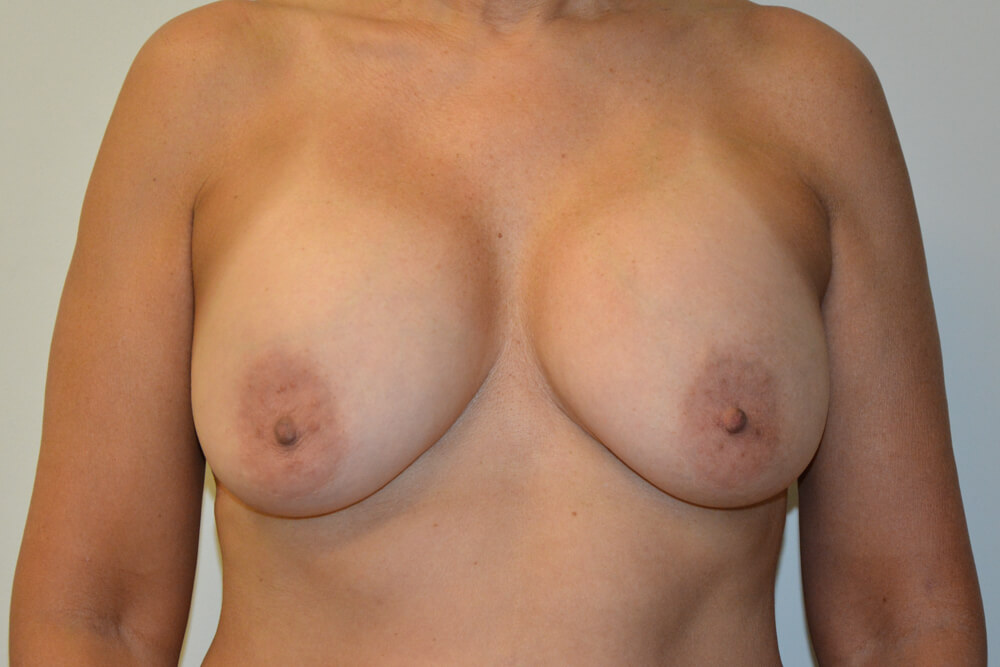
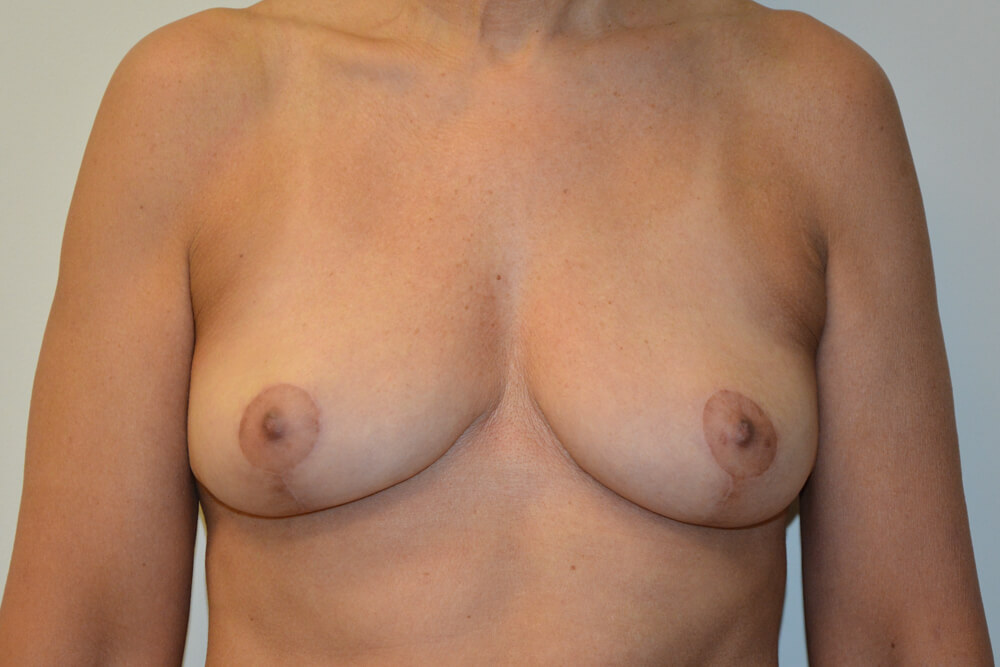
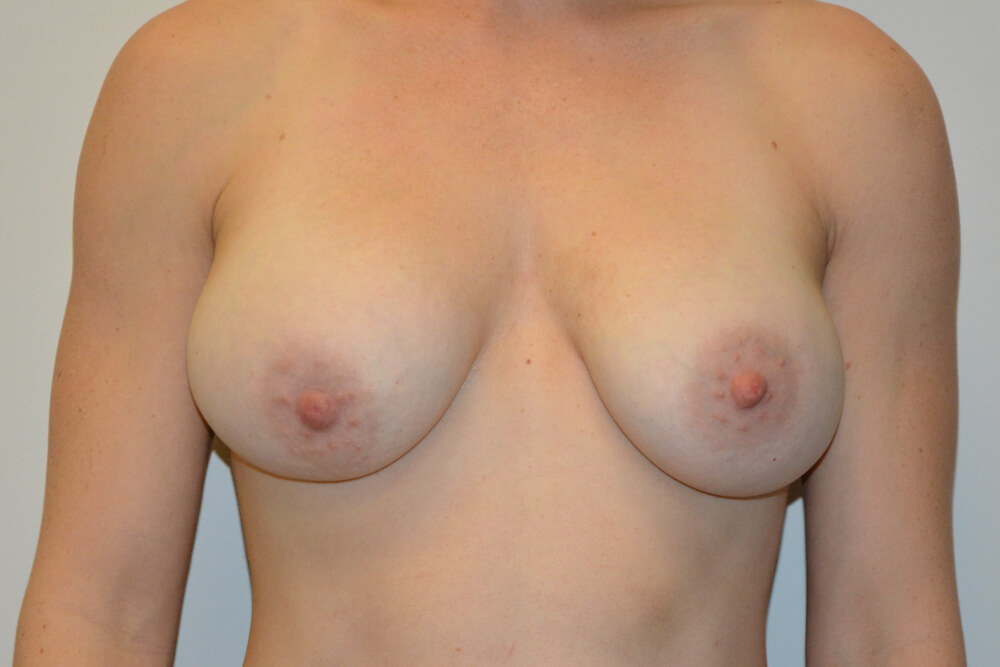
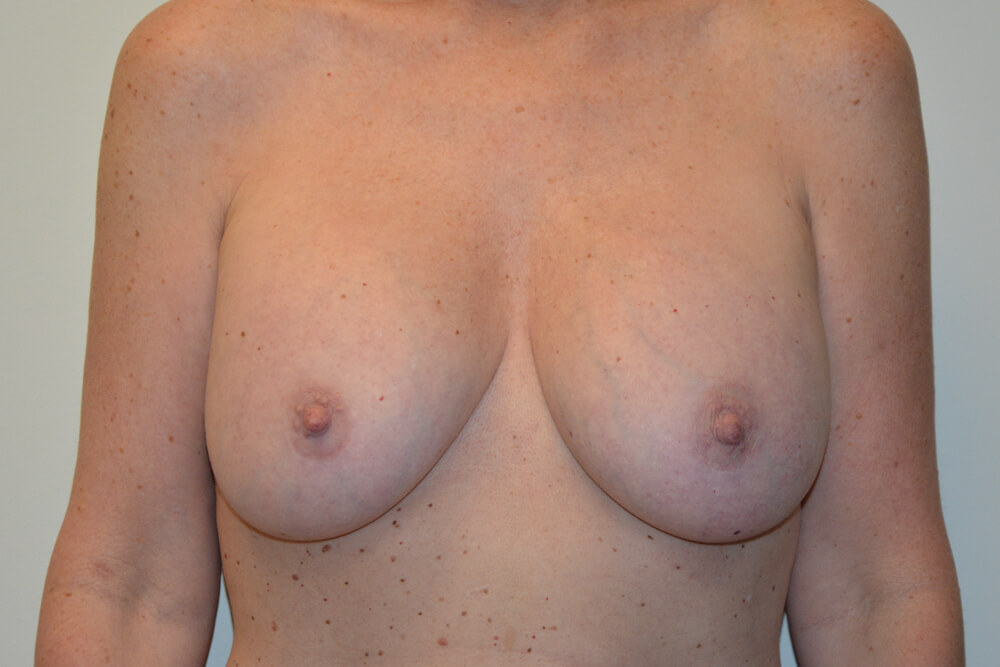
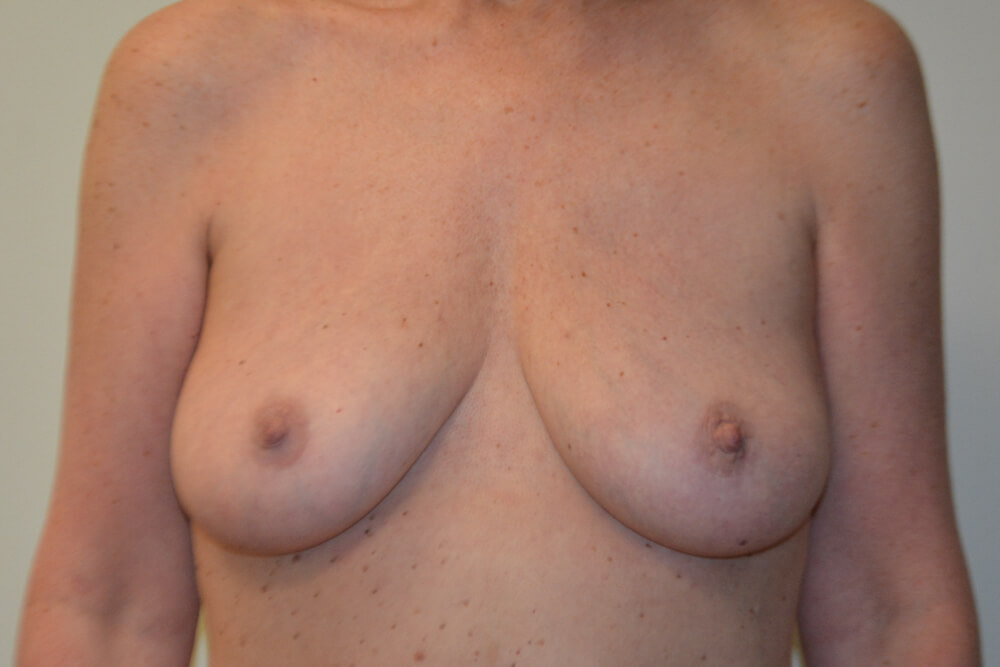
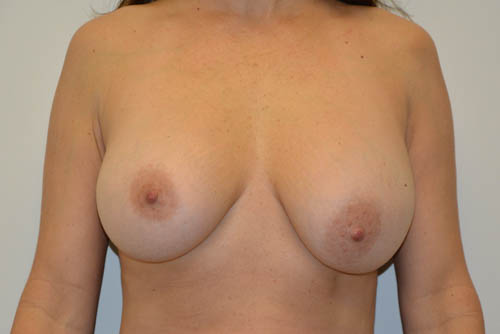
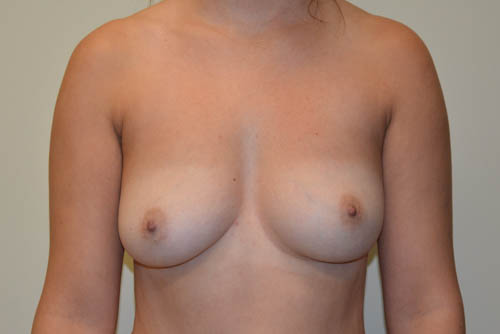
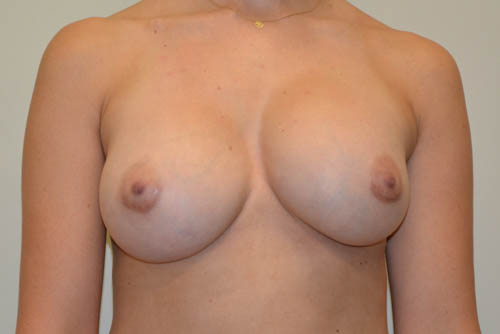
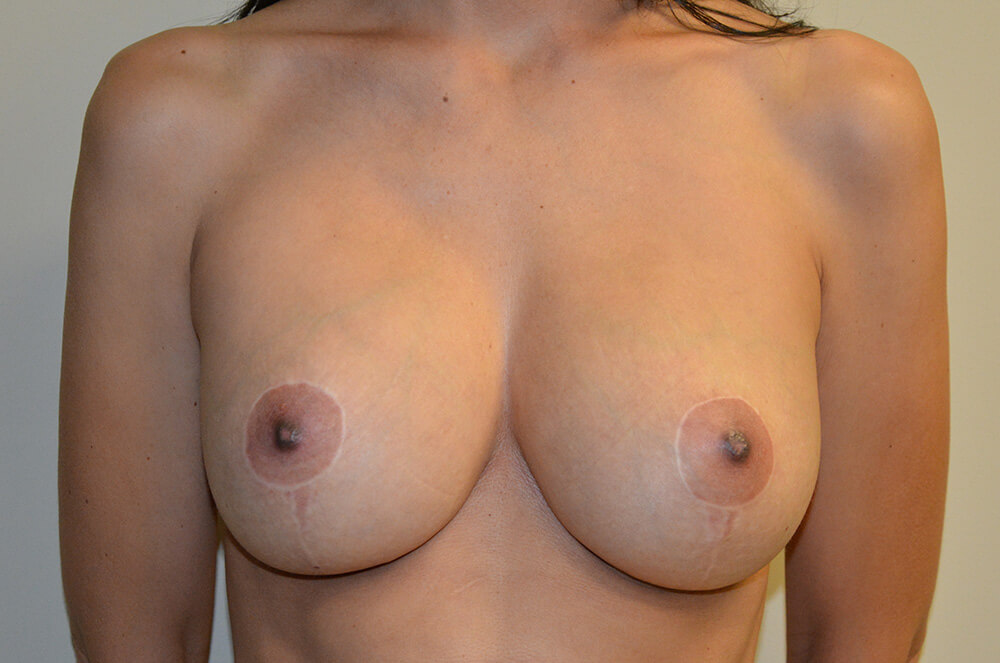
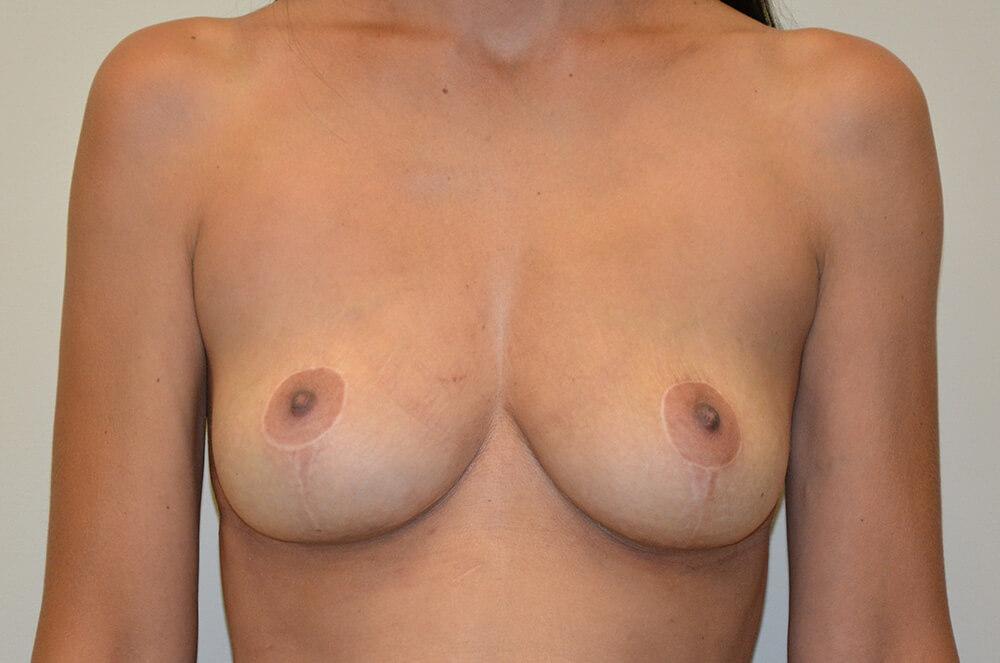
Patient 1
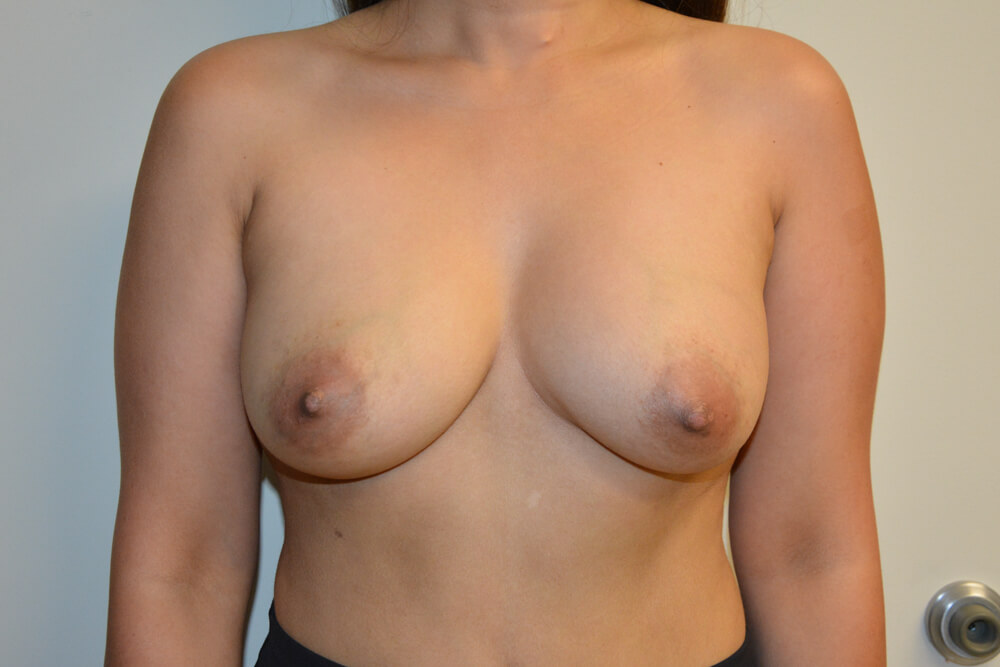
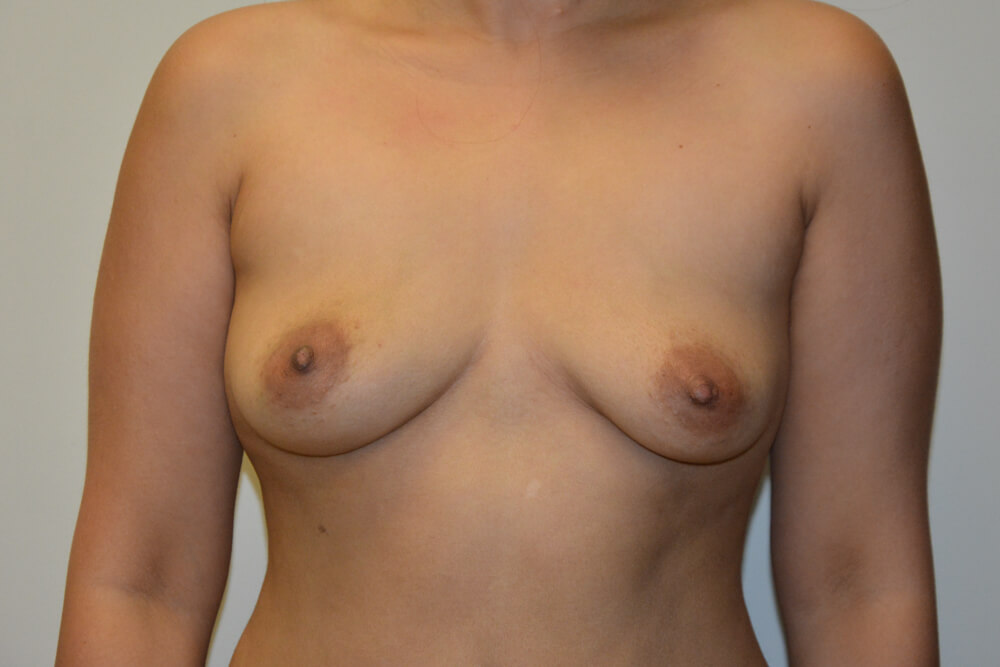
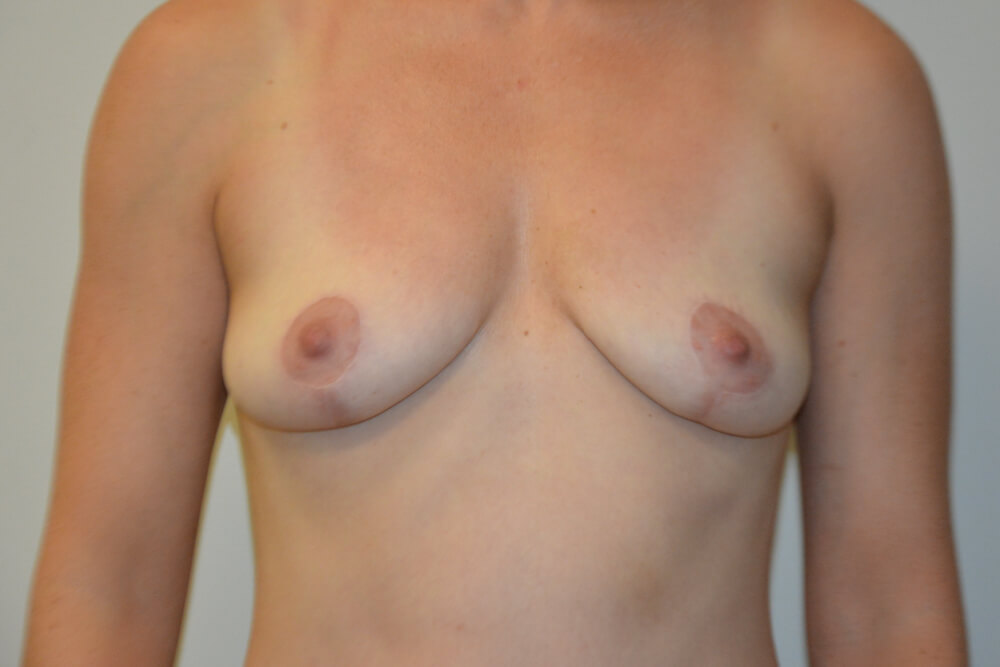
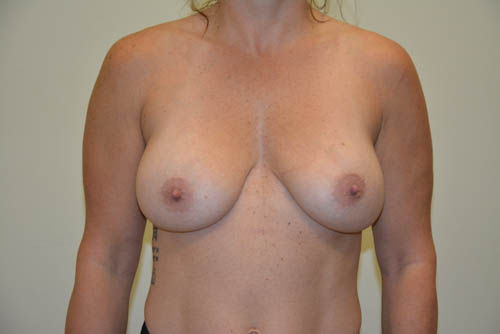
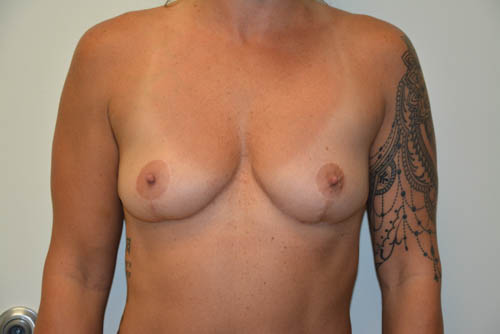
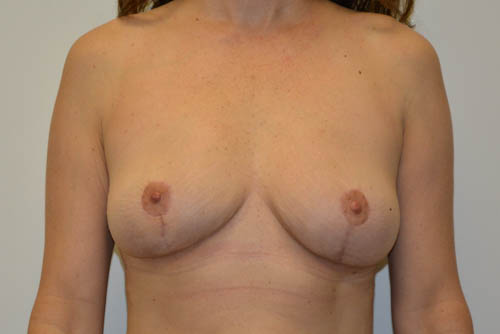
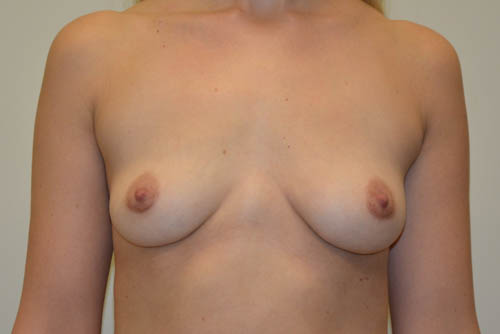
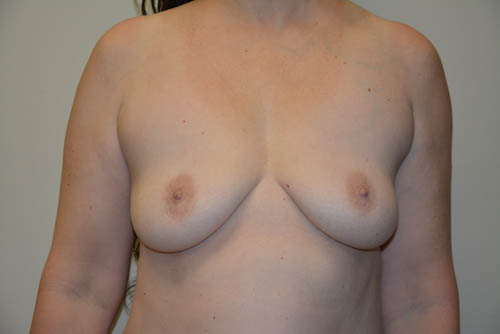
Patient 2
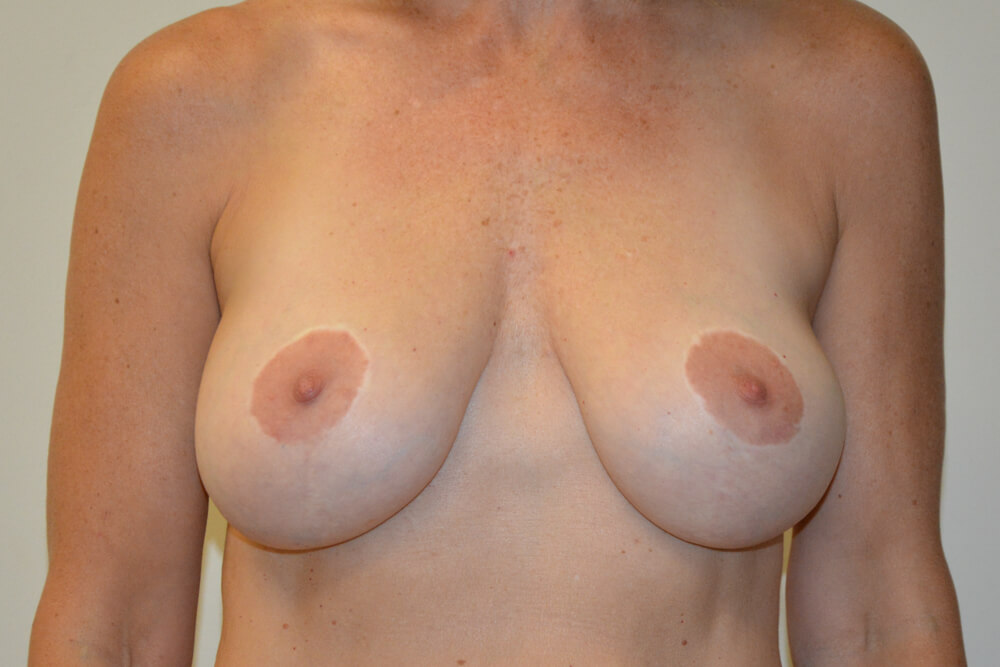
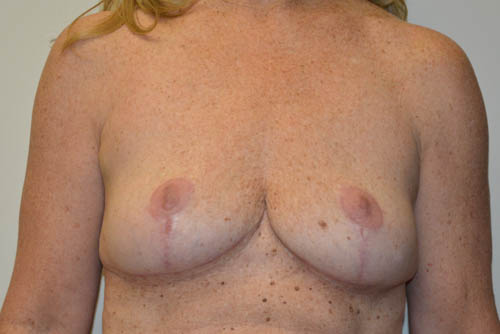
Patient 3
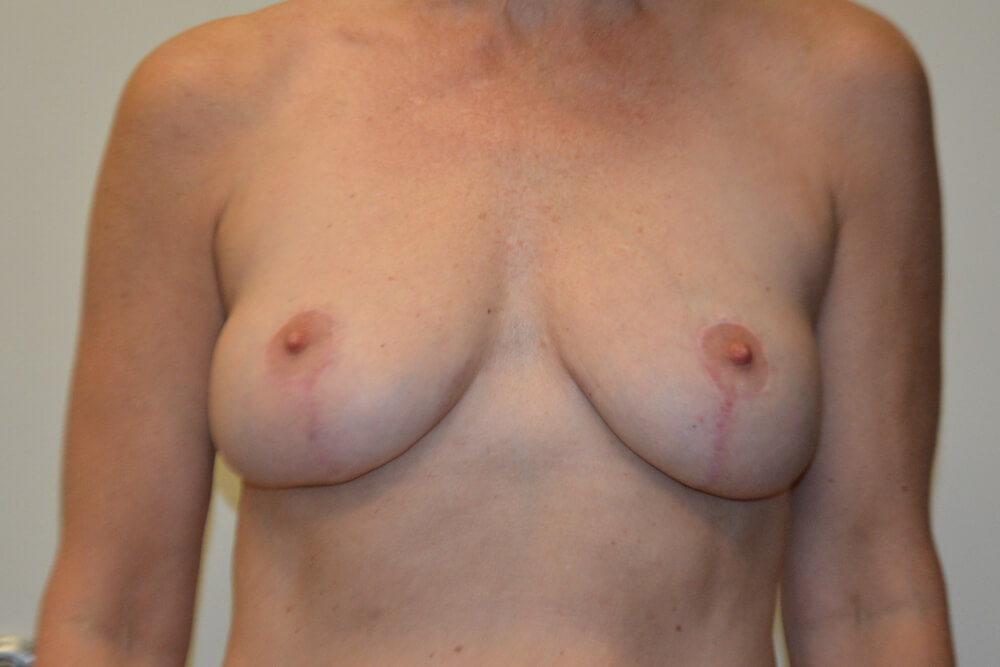
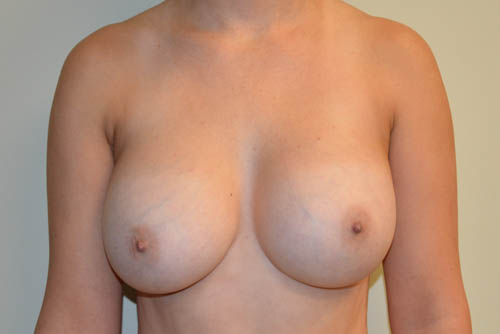
Patient 4
Patient 5
Patient 6
Patient 7
Patient 8
Patient 9
Patient 10
Patient 11
Patient 12